LCD to LED Conversion - Fixing a CCFL LCD screen with a dead backlight with an LED backlight panel
Alright now it's time for another ghetto-tech laptop screen repair tutorial. LED to LCD conversion method.
This method will also work if all you're doing is replacing the bad CCFL backlit screen with a new LED backlit screen. Then just plug in your laptop display cable and inverter cable directly to the converter cable. And use the converter cable to power your display and backlight. The following method will let you be able to use a working CCFL backlit screen on a smashed LED backlit screen casing.
Lets say you have a 15.6" LCD screen with a dead CCFL backlight and a smashed 15.6" LCD with a good LED backlight. Well, you'll be able to put them together to make one good working screen. Here is what you need.
1. Good 15.6" LCD Screen with dead CCFL backlight
2. Bad/smashed/cracked 15.6" LCD Screen with good LED backlight
3. LED to LCD Converter cable with a "Toshiba" attachment. (Basically an inverter for LED Screens)
This is the cable you need, it has the additional inverter type thing
 Carefully pry open the casing of the dead backlight screen, and dispose of the backlight panel. Keep the LCD panel and the circuitry on the back.


Carefully pry open the casing of the cracked LED backlit screen. Now this LED backlit screen you cant just dispose the LCD panel, because it is connected to a board that also provides power to the LED backlight. You're gonna have to tear out the connectors for the LCD, keeping the wiring to the LED backlight and the whole circuit on the back. Then dispose of the cracked LCD panel.


Now, if you pay attention here, an LED backlit screen casing is upside down. Hence, you wont be able to get the wiring for the LCD panel over the flat edge. Because when you put the border back on it will just slice the cables. You're gonna have to assemble it in a way that the LED backlight is now on the top and the wiring for the LCD panel goes comfortably between the tabs at the botton.


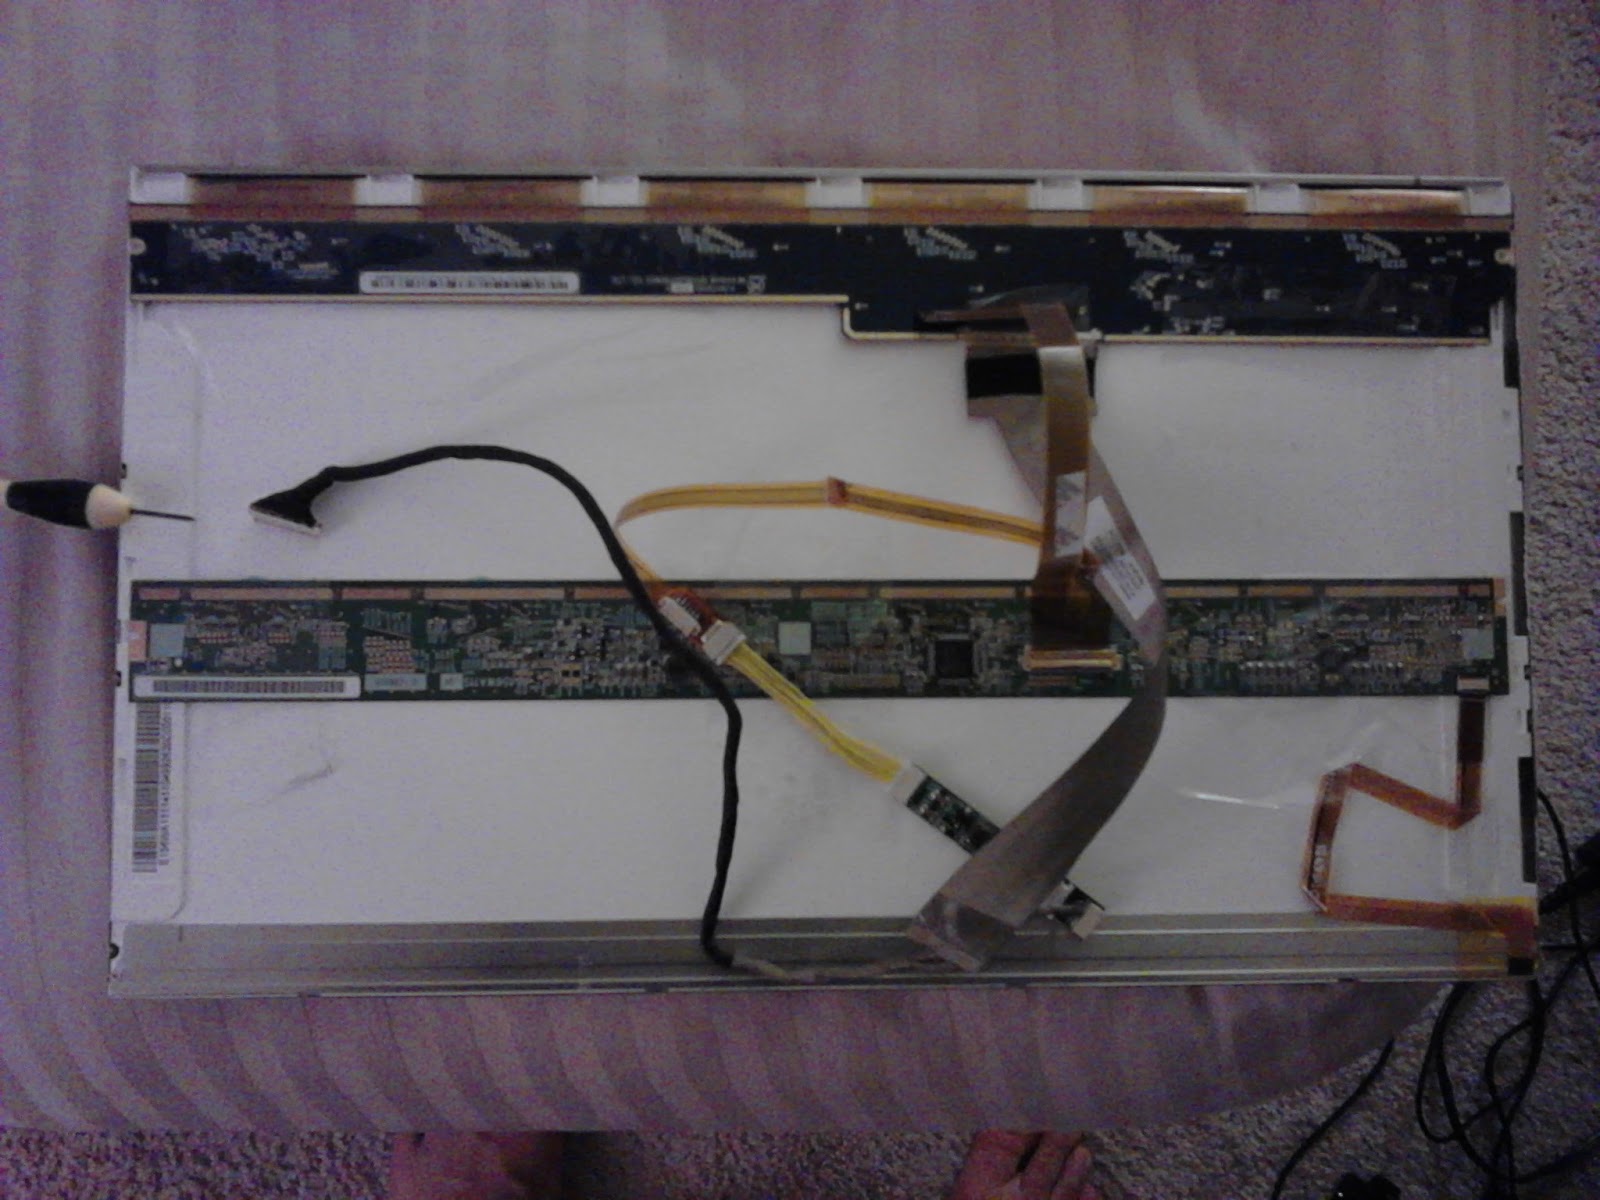
Yellow screwdriver points to the point of attachment of the LED converter cable, black screwdriver points to the point of attachment of the original laptop display cable. Tape off the display cable attachment that comes with the converter cable.
Now, using this converter cable, we're gonna connect our laptop's display cable only to the LED backlit screen's circuit, so all we get there is the back light. And to the LCD panel circuit, so we can have display.

The screw driver points to the point of attachment for the backlight wire, on the right is the connector you're gonna tape off and NOT USE.

Screw driver in this one points to the only connector you're gonna have to connect to the motherboard.

Put it all together, put the casing cover from the LED backlit screen and there you go. When you turn it on it should work like this one is. You might not be able to control the backlight brightness, but hey, full bright doesnt hurt. Be very careful putting the screws back on the frame, there are two attachment points where the ribbon cable is over the screw hole.

This method will also work if all you're doing is replacing the bad CCFL backlit screen with a new LED backlit screen. Then just plug in your laptop display cable and inverter cable directly to the converter cable. And use the converter cable to power your display and backlight. The following method will let you be able to use a working CCFL backlit screen on a smashed LED backlit screen casing.
Lets say you have a 15.6" LCD screen with a dead CCFL backlight and a smashed 15.6" LCD with a good LED backlight. Well, you'll be able to put them together to make one good working screen. Here is what you need.
1. Good 15.6" LCD Screen with dead CCFL backlight
2. Bad/smashed/cracked 15.6" LCD Screen with good LED backlight
3. LED to LCD Converter cable with a "Toshiba" attachment. (Basically an inverter for LED Screens)
This is the cable you need, it has the additional inverter type thing


Carefully pry open the casing of the cracked LED backlit screen. Now this LED backlit screen you cant just dispose the LCD panel, because it is connected to a board that also provides power to the LED backlight. You're gonna have to tear out the connectors for the LCD, keeping the wiring to the LED backlight and the whole circuit on the back. Then dispose of the cracked LCD panel.


Now, if you pay attention here, an LED backlit screen casing is upside down. Hence, you wont be able to get the wiring for the LCD panel over the flat edge. Because when you put the border back on it will just slice the cables. You're gonna have to assemble it in a way that the LED backlight is now on the top and the wiring for the LCD panel goes comfortably between the tabs at the botton.


Yellow screwdriver points to the point of attachment of the LED converter cable, black screwdriver points to the point of attachment of the original laptop display cable. Tape off the display cable attachment that comes with the converter cable.
Now, using this converter cable, we're gonna connect our laptop's display cable only to the LED backlit screen's circuit, so all we get there is the back light. And to the LCD panel circuit, so we can have display.

The screw driver points to the point of attachment for the backlight wire, on the right is the connector you're gonna tape off and NOT USE.

Screw driver in this one points to the only connector you're gonna have to connect to the motherboard.
Put it all together, put the casing cover from the LED backlit screen and there you go. When you turn it on it should work like this one is. You might not be able to control the backlight brightness, but hey, full bright doesnt hurt. Be very careful putting the screws back on the frame, there are two attachment points where the ribbon cable is over the screw hole.

posted by BiLLA at 8:55 AM
![]()

2 Comments:
Billa48, where do you plug in the little white plug on the LCD cable for the CQ60? I looked at that green inverter thing, and I am positive none of those outlets will fit that plug. I'm thinking that you plug it in at the junction point where the yellow cable meets the brown ribbon cable. I have an Acer 5335 that I'm trying to convert the CCFL screen, which broke, to the cheaper LED screen and that plug at the junction point...I know....would fit...just like the CQ60. Am I right?
Regarding that last post, I wrote that in response to a post you put at this link:
http://forum.notebookreview.com/hp-compaq-presario-g-series-mini-notebooks/623016-upgrading-cq60-ccfl-screen-led.html#post9112383
I couldn't see where I could ask you this question directly at that website, so I came here. Sorry for the intrusion.
Post a Comment
<< Home